Friday, August 7, 2015

The Outdoor cushion Project


We got this outdoor set for free... buuuuutttttttt... the cushions were AWFUL! Like SUPER bad. Really bad. When I looked online fro prices I was looking at $60 per CUSHION! We have 6 chairs- 3 cushions each. The deep ones. Yeah, I got the set for free I did not want to spend $600ish on cushions when for a little more I could get a brand new set. The set we got FREE is $800 at Menards. So I pinterested recovering out door cushions. I found a ton of tutorials. Some claim to be 'easy' but when looking at them, they were not easy to follow at all. At least not for a novice like me! After awhile I found a GREAT tutorials at...


I folllowed her tutorial and instead of stitching the end I glued it. Yes, glued with my Hi-temp glue gun. The idea I got from...


With these two awesome tutorials I took my cushions from this...


...to this..


My steps were as follows: my material would not work to do as confessions of a serial Diyer intended. Yes, I could have used 11/2-2 yds per cushion but I'm looking for CHEAP. So each of the 12 cushions get 1 yard! Cheap, frugal- whatever! Saving myself another $60!

So...
1. Finish 1 of the long edges- the 3ft side- not 54" side. This edge will be the front of the cushion, so make sure you finish the proper edge.
I didn't pin but you could! :)
Finished. Not perfect... But it'll work! 

Next lay the cushion on the bright side of the fabric...  The front of the cushion facing sewed side. Pinch and pin the fabric so it's pulled tightly against the cushion. 

(Remember- the side you sewed a nice edge will be the FRONT of cushion)

Sew your pinched and pinned seam. I always pinned knowing I'm going to sew on the side of the pin away from white part. So the cushion material was tight.
Next...
Put the cushion in to your sewn fabric. Fabric should still be inside out.
Pinch and pin the unsewn edge shut.
(Right now you're making the back of the cushion cover.)
Then sew.you should have a pillowcase looking thing!!!
...
So now you're going to pinch and pin again. Put the cushion inside the inside out pillow case you've just made. Make sure the seam is in the CENTER of the underneath of the cushion. The front of the cushion should be facing the opening of the 'pillowcase.'
When it's all lined up pinch the 2 corners to form a triangle.

Sew the pinched and pinned line....
Then flip right side out and insert pillow.
SO you have a pillow in a pillowcase :)

Insert cushion into the pillowcase. I folded mine like a present. I, then, hot glued it... Yes! Hot glue!!!
 I (love my high temp glue gun... I glue everything! Including the decorative type ring around my fog light on my car!)


Here is my final product! They've lasted all summer! With PLENTY of use!!!

Good luck!
Kelly xxoo


Wow! Summer went fast

My goal was to blog like crazy! Get this thing going and guess what?! Didn't happen and I know I am taking my readers on a roller-coaster ride and for that I am sorry! We just moved and went on 3 different vacations- too many. Fun but too many. Our house purchase was a short sale and that was a nightmare. IT needed so much work, meaning endless nights.

School is starting up- for me- next week. Wednesday- what?!?!?!? So crazy. But in a few weeks My daughter starts kindergarten. I am looking for organizational tools. I need to. I will not survive. We have a new nanny coming in for our 2 year old. I love her dearly, but it's different. With the m ove we switched gyms. I know it sounds nuts, but I miss my peeps. Life is hectic and as I look to organize I will make time to blog- weekly- hopefully more than once. I want to be on top of it and at times I don't.

One bit of info I want to share with you is this app- PERISCOPE. Really cool. Live real time streaming. I have been following a few peeps. My favorite is Chalene. IT's a chance to see the world through another's eyes. So cool. I will get on there...soon! Look for me :)
Peace out guys! Please follow me to see my most updated posts. THERE WILL BE MORE!
xxoo
Kelly

Tuesday, May 5, 2015

DrumFIT

I am so excited! Last Friday I was trained in DrumFIT. DrumFIT is an awesome mind, body exercise program! You use fitness balls and drums stick to kill massive amounts of calories! They claim up to 500 per hour...I'm thinking it COULD BE more. I did almost an hour and my heart rate monitor went- BAM up to 474!!! I didn't know the routines or what it was about, the more you do it and get good, the better your workout will be! 
Needless to say, I created DrumFIT routines every time I hear a song. So far I did Taylor Swift's Shake it Off and Selena Gomez come and get it! Tonight I'll be working on Uptown Funk! HOT DAMN! And just completed an ab routine to Hey Mama by Nikki Minaj!!!
Watch for videos and more info on the awesome exercise known as DrumFIT!

Check it out HERE!!!!!!!

Thursday, April 30, 2015

A little bit of paradise {Cocktail!}

Heyyyyyyyyyyy......
So, last night Chad came home and had a delicious drink recipe I HAD to share. I love coconut, Pina Colada, stuff like that. His friend had told him about the Ciroc Coconut Vodka. Chad hates coconut but wanted to try it so we hit the liquor store- wishing it was Friday yet it was only Wednesday- boooo!!! I picked up the Ciroc vodka and pineapple juice. Mixed it up- yum! Then did a shot- it was surprisingly delicious! The bottle was $30, so I hoped it'd be good! 
Recipe- here ya go!!!


A Little Bit of Paradise


1 shot Ciroc Coconut Vodka
Pineapple juice 
Splash of Grenadine

Fill a rocks glass with ice. 1 shot of Circo, fill to brim with pineapple juice, add a splash of grenadine and try!

Add ice and 1 shot Ciroc to rocks glass...

Next add pineapple juice to brim...

Add a splash of grenadine...

Enjoy!

~YUM ~

A Little Bit of Paradise
Kelly XXOO

Try it? What'd you think?


Monday, April 27, 2015

Hey ya'll


I'm back! It's been crazy here!!! Trying to buy a SHORT SALE. Frickin crazy- great deal but a great deal of bullshit too! Maybe closing mid may, maybe not! Ugh! I'm coaching GIRLS ON THE RUN, here in IL too!!! So one of my next posts is going to be this killer dessert cake! Watch for that! 

But, in the mean time my fellow Chalene johnson fans- have been following her podcasts? OMG! I'm lovin them! I totally want to post a link but the blogger app sucks. If anyone has a better way to use Blogger let me know! I need to get on a compute to get some good links in. Tomorrow I'm going to share my love of Chalene and how she's helping me change my life! 

Well, peeps, have a great night! I've been missin ya!!! Come back :) 

 OMG! Btw- do you see the crazy ass face in that jacket behind me!!! Ahhh! FREAKED ME OUT!!!
Kelly
Xxoo

Wednesday, March 4, 2015

Teach your daughter - Mean Stinks campaign by Secret

Hey guys!!!
 So I have an awesome new love interest to share with you. It's called Mean Stinks- a girls anti-bully campaign by Secret. I came across it when I signed up to be a Girls on the Run coach. The ladies there had blue pinkies and I was like what was that for?  And so I googled it when I got home to see what the blue pinky deal was. And MeanStinks.com showed up from swab, I watched the videos and read a little about it.  I LOVED it. It's definitely geared towards high school kids because that's where a lot of the bullying happens and girls can be very mean. Buuuut since I liked it I thought… I could totally do something with this with my daughter. She's five and even girls at her age are mean so I came up with something more age appropriate for her. Here’s what I did:


First, I got the book the recess queen. We read it together and as we read we talked about bullying and how to treat other kids. I generalized to kids rather than just other girls- due to her age. We talked about the characters, how they were acting in the story and how the other kids in the story felt. Every couple pages, we tried to make connections to her school and friends. I really wanted to emotionally relate to the story and the idea behind it.


Then I showed her a couple of the clips of the Mean Stinks campaign. We talked about the videos and what was happening and things she could do in her school and with her friends. After that, we agreed that we would be nice to other people and other kids and that we would paint our pinkies blue to show that we believe in being nice to everybody and that...


I made a paper that said Mean Stinks and we colored it in together, talked about different ways we could be nice and revisited the story and what we read. We talked about what we would tell others if they ask us about our blue pinkies.


The next part is a video that she decided to make; she wanted to tell everybody that MEAN STINKS!
Check out OLIVIA!


I highly encourage you to purchase The Recess Queen by Alexis O'Neill . Here is a link to the story if you would 
like to see/ listen to the story and do these activities with your child.


Hope you enjoy!
Please leave any comments below

Kelly
xxoo

Sunday, March 1, 2015

Magic Marker fun

Looking for a cool way to help your kiddo with their sight words, math facts or anything needing memorization. Tired of flashcards???


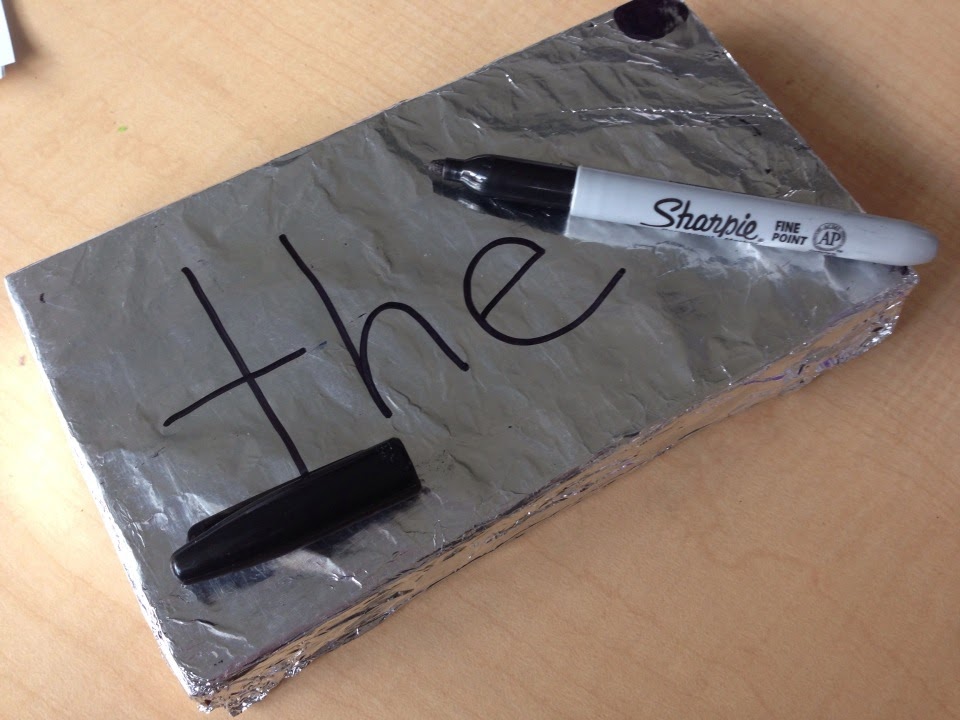
Check out this "magic trick" you child will LOVE! My favorite OT gave me the idea for this and I thought I'd pass it along.

All you need is:
A permanent marker
A Sharpie
A Q-tip
and
Something covered in aluminium foil ( this is a VHS tape- FINALLY a use for those honkers!)

First, have your child write the desired word or problem with Permanent marker. Be sure to supervise, I'm sure you don't want their work permanently on your table cloth or clothes!

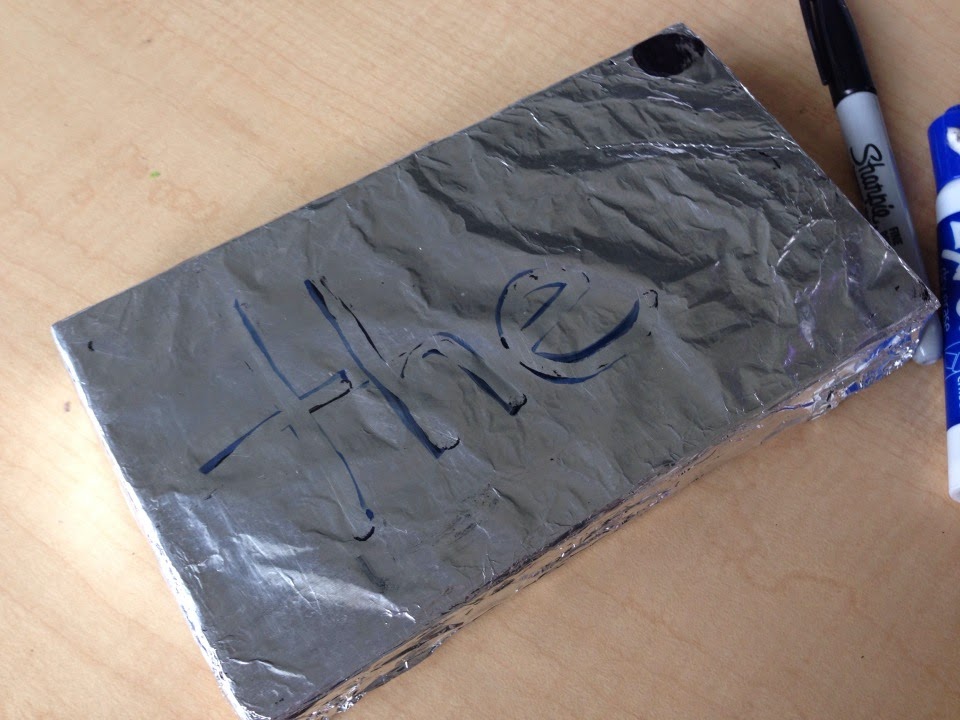
Next have the child GO OVER the Sharpie with the Expo marker

Then have them use the Q-tip to trace the writing again. The Q-tip will erase the writing and your child has now practiced the word, problem,etc. THREE times! :) Plus using the different sized instruments will help their grip! BONUS!


Word erased:

You can wipe it to get the excess off and try a new word! 

Hope you enjoyed this post. I love finding fun ways for kiddos to practice and learn!
If you liked this, please share or share your experiences or ideas!
Thanks!
Kellyxxoo