Showing posts with label Craft. Show all posts

Thursday, October 1, 2015

$5 DIY Halloween Wreath- so fun and easy!

Hello ALL!

I have a fun Halloween craft that is soooo easy, inexpensive and can be done in less that 30 min. It took me about 15 to make. So fast, sun and easy I made two and have the stuff for a 3rd! It'd be a great Halloween gift and easy enough for the kiddos. Definitely help them with the glue though! ;) Check it out below!


All my materials were from Dollar Tree but you could get them anywhere- JoAnns, Michael's, Hobby lobby, etc. You could add more or less given your taste!
All I used was a foam a foam wreath, 2 boas, a roll of ribbon, an owl and same bats. You will need hot glue to attach everything.

First, I wrapped the ribbon about the foam wreath. It gives a little color under the feathers in case the feather don't completely cover the wreath. This was not the best color to have but it worked. On my other wreath I used ribbon that was not see through.


All done...


Nest wrap the two boas around the wreath. I wrap them side by side rather than end to end. You need to hot glue each of the boa ends down, wrap and glue when fully wrapped. Before adding dabs of glue to hold feathers in place, fluff them to cover all parts of the wreath.


Next add in your main decoration. I added the owl here. It was a little tricky getting him to stick but with enough persistence and hot glue he stuck. And BONUS, he has light up eyes. SO I had to be especially be careful not to glue the on/off button. 


Tada! 
Next I had 2 clippy bats. I, actually, clipped them to the boa and did not glue them at all! They stayed perfectly fine!!!

Finished product:


And then, eyes- lit up!


Here is another one I made! This was the first then I thought, how cool would it be to share this cool, inexpensive craft with you!


Hope you enjoy! f you make one- please share! I love looking at other's crafts!!!

Kelly
xxoo

Sunday, March 1, 2015

Magic Marker fun

Looking for a cool way to help your kiddo with their sight words, math facts or anything needing memorization. Tired of flashcards???


Check out this "magic trick" you child will LOVE! My favorite OT gave me the idea for this and I thought I'd pass it along.

All you need is:
A permanent marker
A Sharpie
A Q-tip
and
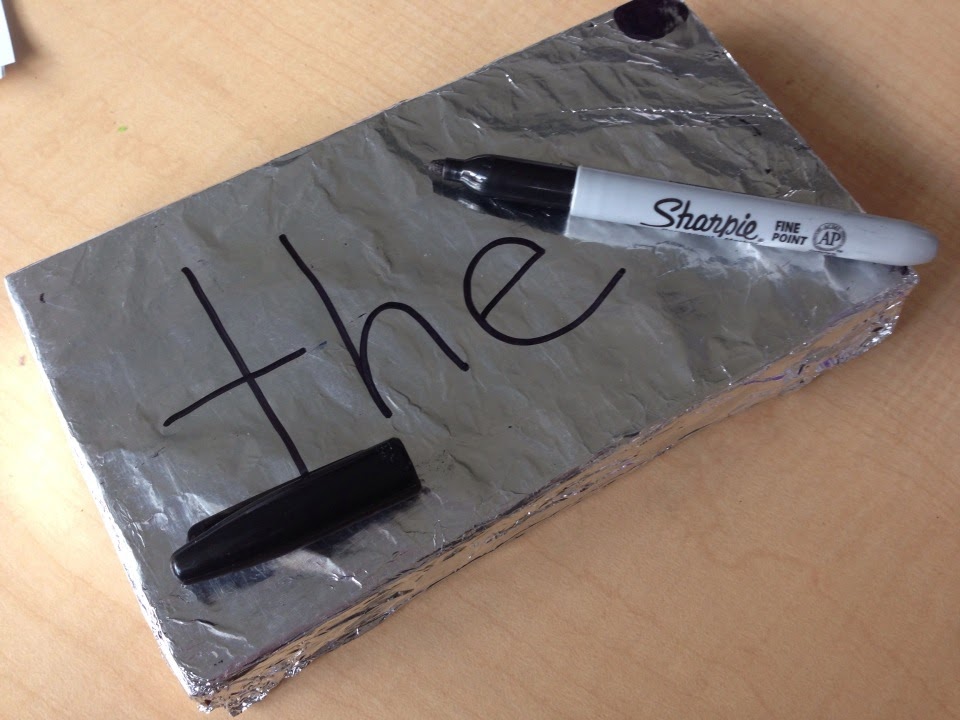
Something covered in aluminium foil ( this is a VHS tape- FINALLY a use for those honkers!)

First, have your child write the desired word or problem with Permanent marker. Be sure to supervise, I'm sure you don't want their work permanently on your table cloth or clothes!

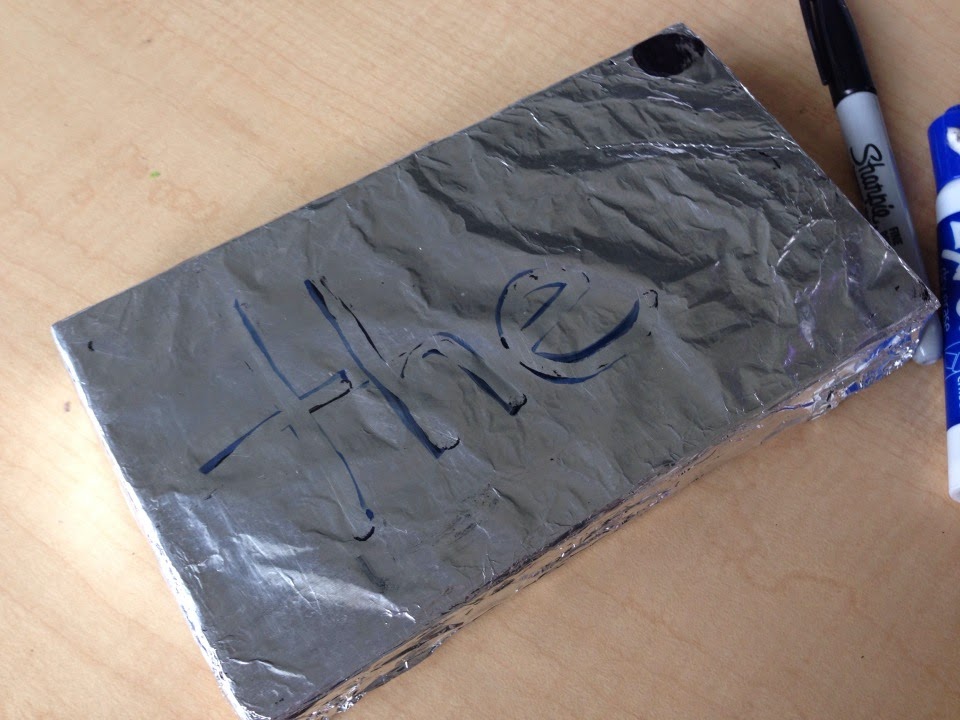
Next have the child GO OVER the Sharpie with the Expo marker

Then have them use the Q-tip to trace the writing again. The Q-tip will erase the writing and your child has now practiced the word, problem,etc. THREE times! :) Plus using the different sized instruments will help their grip! BONUS!


Word erased:

You can wipe it to get the excess off and try a new word! 

Hope you enjoyed this post. I love finding fun ways for kiddos to practice and learn!
If you liked this, please share or share your experiences or ideas!
Thanks!
Kellyxxoo


Saturday, February 14, 2015

Super simple and Fun Holiday gift for kiddos to make

Need a quick and easy, simple and fun gift idea for the kiddos to make? Look noooo further! This is a really cute magnet that can hold a card, kids picture or special note. We made ours for Valentines day. Olivia is having her own party tonight- with my help of course. Everything she planned, shopped for and picked out. It ended up costing about $25 but well worth the creativity, educational experience and proudness she and I both felt. Proudness? Is that a word? I think I am looking for another one, but wheteve, 


So, totally easy all you need is: 

A base (I used foam hearts)
Stickers or  any crafty embellishment
Clothes pin
Hot glue
magnet

 Here are the foam hearts and stickers we used:


Olivia enjoying her craft time:


Here is her final product and materials I used to complete this project:


Glue clothes pin on to foam heart or whatever you choose:


 Waa la:


Now glue magnet into clothes pin


Taaa Daa


Finished product:

Happy Valentines Day!

Kelly xxoo

Saturday, February 7, 2015

Beautiful Wine glass charm DIY

Holy Crap! It's finally Saturday! Eventually, I will get this down to posting daily or bi-daily but working and life, make it so difficult. You'd think this was a quick thing- not really. Writing, editing, photos and more editing! But I'm here and I have a really fun project for you to try at home. Perfect for the wine-o in your life. Wine-o  how the heck do you spell that?! I don't know- "Google!"

So what I have for you today is a super easy wine glass decoration. Totally personalize-able (another crazy word- is it a word? I don't know!) and a great gift for someone after a long stressful. Which is how this post came to be!
 MAGNETIC WINE CHARMS


It's so simple, quick and fun. Add a glass and a small (or LARGE) bottle of wine and BAM awesome gift!

So... let do it!
First you need a Neodymium Magnet (super strong) size depends on the size of your charm to be- I used a 7mm disc magnet, a button, charm or stiff sticker, glue gun and something to cut metal if you opted for a button.

Here's the pink sparkly butting I chose,


Next, but off the back part of the button. I recommend sanding the back so that the glue will stick better and your charm will have a flat bottom. 


After you have sanded the back flat use you glue gun to affix the magnet tot the back of the charm. I HIGHLY recommend a high temp glue gun. It get VERY hot, I do not recommend using with any children around


Pull the little glue strings off and attach to the cup. One magnet goes in the glass the charm on the outside. These magnets are very dangerous for children. They are easy to swallow and extremely dangerous in their belly. For adult use only. Please use carefully. Using a good quality magnet will ensure that it sticks together and does not come apart in the glass!


 Thanks for reading! Please like and share :)
Kelly xxoo


Monday, February 2, 2015

Snow...what?!?! ThE bEsT SNOW ICE CREAM EvEr!!

Hello Monday!!!! Annnd for us in the midwest... hello snowstorm Linus....yaaay (can you sense the sarcasm? It's there.) But what else does snowstorm bring besides snow? Snow ice cream. One of my favs! I used to work at a day care and when it snowed we'd rock the snow ice cream. Now that I have my own girls- WE rock the snow ice cream. It is surprisingly good. Just make sure to get clean snow. Yah know, 'Don't you go where the Huskies go and don't you eat that yellow snow!'


SIDE NOTE (to see snow ice cream SCROLL ON)
Despite the inability to travel easily, there are some living things that enjoy the snow! Meet my Husky Mya! She loves the snow, she spends a lot of her time outside this time of year.


And then there's my polydactyl cat- Schwartz. He's confused as to whether is a cat or dog. But he too, enjoys the snow. 

And so, now, for how my girls and I enjoy the snow- from inside!

This recipe is super easy. First collect about 8 C of CLEAN snow. And don't mind the child is summer jammies collecting SNOW! It was a quick collect ;)
Next, gather all ingredients: 1 C milk, 1/3 C sugar, Pinch of salt and 1tsp Vanilla extract.


Add everything to a large bowl and mix to desired consistency.

Scoop into bowls, add sprinkles- A MUST!
and Enjoy!!!
Yummm....

Here's the recipe:


Thursday, November 27, 2014

Happy Thanksgiving!

❤️SIMPLE DIY THANKFUL CRAFTS!❤️

Can't wait for Thanksgiving festivities to begin! Here's a little DIY Thank you gifts! Yesterday there were some special people I wanted to thank. I made them something little!! It let them know I thought of them and was thankful for their help and friendship!

First up...

My mom helpers in my classroom! Always there to lend a helping hand!!! Decided to get a nice mosturizing lotion and some soft gloves to keep those hardworking hands safe :)

Tape the lotion to the glove then tie a knot around the pair.

Write a personal message showing your appreciation!

Put together! A nice little THANK YOU!

Next up...

My Zumba peeps! Gotta couple friends there I'm always happy to see and keep up with! As I was making the Thanksgiving day fudge I thought how nice it would be to let them know I care! 

So, hey I'll wrap up some fudge for each!

Then reality hit- you're going to WORKOUT. Fudge may not be the best thing! So... 

I had some fun color changing straws and I paired them with an energy water for a small thankful for you 'gift' idea!

Tie it together for a final product of...

So, there ya have it! Nothing spectacular, but small ways to show you care!

Happy Thanksgiving!!!
Kelly
xxoo